English
 Español
 中文简体
中文简体
Content
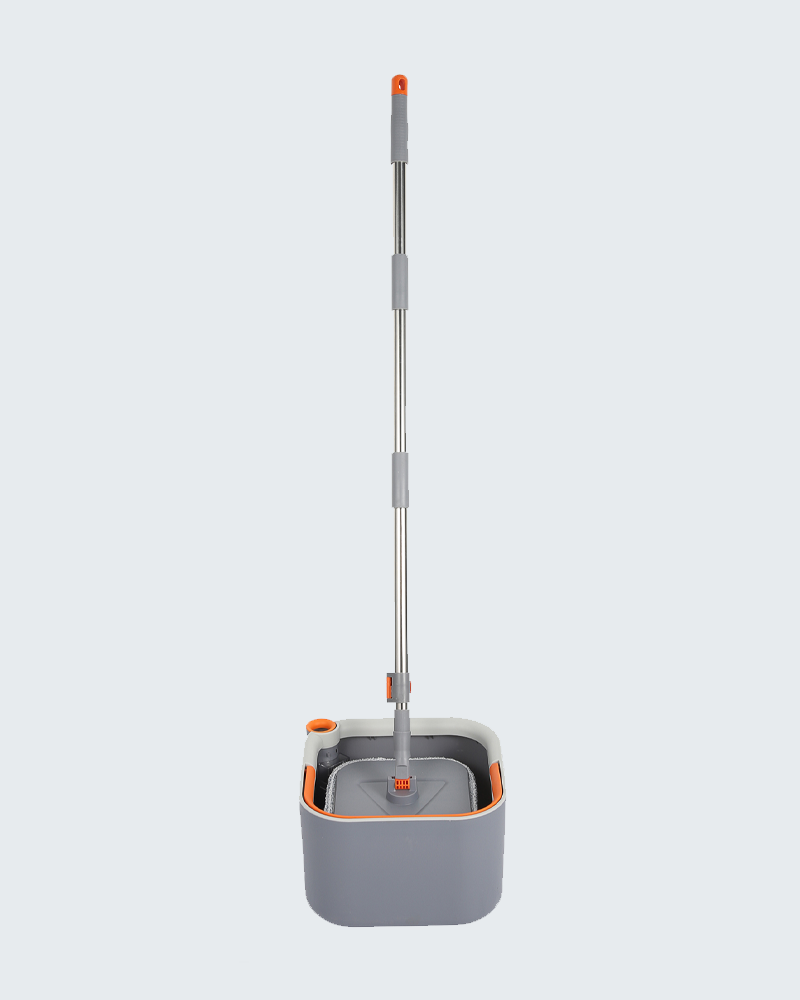
- 1 Understanding the Components of a Flat Mop Bucket Set
- 2 Setting Up the Bucket: Water Temperature and Cleaner Ratio
- 3 Adjusting the Handle to the Right Height
- 4 Loading the Mop Pad: Saturating and Wringing Correctly
- 5 Effective Mopping Technique: Strokes, Direction, and Pattern
- 6 How Often to Change the Water During a Cleaning Session
- 7 Pre-Sweeping: Why It Matters Before Every Mopping Session
- 8 Mopping Different Floor Types: Technique Adjustments
- 9 Common Mistakes and How to Avoid Them
- 10 Cleaning and Maintaining the Mop Pad
- 11 Maintaining the Bucket and Wringer Mechanism
- 12 Flat Mop Bucket Set Tips for Specific Cleaning Scenarios
To use a flat mop bucket set effectively, fill the bucket with the correct water-to-cleaner ratio, submerge the mop pad fully, press it through the built-in wringer until it is damp but not dripping, then mop in overlapping figure-eight or S-shaped strokes while working backward toward the exit of the room. Change the water whenever it becomes visibly dirty — typically every 20 to 40 square meters — and rinse the mop pad thoroughly after each session to prevent bacterial growth and pad deterioration.
Using a flat mop bucket set correctly is not complicated, but a few specific techniques determine whether the result is a genuinely clean floor or simply a floor covered in diluted dirty water. The sections below cover setup, mopping technique, water management, common mistakes, and care routines that together make a measurable difference in cleaning quality and equipment lifespan.
Understanding the Components of a Flat Mop Bucket Set
Before diving into technique, it helps to understand what each part of a flat mop bucket set does, because using each component correctly is what separates effective cleaning from ineffective cleaning.
- The bucket: Usually rectangular and sized to accommodate the flat mop head width — most standard flat mop buckets hold between 8 and 15 liters. The shape allows the mop head to submerge flat without folding, ensuring even saturation of the pad.
- The built-in wringer or press mechanism: This is the most critical component. Most flat mop sets use either a pedal-operated press plate or a hinged squeeze frame that the mop head is pushed into. The wringer removes excess water so the pad cleans rather than floods the floor.
- The flat mop head frame: A rectangular swivel frame — typically 35 cm to 60 cm wide — that holds the mop pad. The swivel joint allows the head to rotate 360° and lie flat under furniture.
- The mop pad: The replaceable cleaning surface, usually made from microfiber, cotton, or a cotton-microfiber blend. Microfiber pads are the most effective — their split fibers create a surface area up to 40 times greater than an equivalent cotton pad, capturing fine dust, bacteria, and liquids rather than pushing them around.
- The telescopic handle: Adjustable height handle, usually extending from 90 cm to 140 cm. Correct handle height is important for posture and effective mopping stroke mechanics.
Understanding the role of each part helps when troubleshooting — for example, streaky floors are almost always a wringer problem (pad too wet) or a water problem (solution too dirty or too concentrated), not a mopping technique problem.
Setting Up the Bucket: Water Temperature and Cleaner Ratio
Setup is where many people make their first mistake — using too much cleaner, the wrong water temperature, or filling the bucket too full. Getting these three variables right from the start prevents most of the common flat mop problems.
Water Temperature
Warm water — ideally between 40°C and 50°C — is most effective for general floor cleaning. Warm water improves the solubility and activation of cleaning agents, loosens grease and dried-on soils more efficiently than cold water, and evaporates more quickly from the floor surface after mopping, reducing the risk of streaking and water spots. Avoid water above 60°C for microfiber pads, as high temperatures accelerate fiber degradation and reduce pad life.
For sanitizing purposes — such as in kitchens, bathrooms, or after illness — water at 60°C combined with an appropriate disinfectant cleaner is more effective at killing common household bacteria and viruses than cold water with the same cleaner.
Cleaner Concentration
More cleaner does not mean cleaner floors. Excess cleaning solution leaves a sticky residue on the floor surface that actually attracts more dirt between cleaning sessions, making floors look dull and dirty faster. Always follow the manufacturer's dilution instructions, which for most multipurpose floor cleaners means approximately 20 to 30 ml of concentrate per 5 liters of water — roughly one capful per bucket.
For lightly soiled floors in regular maintenance cleaning, plain warm water is often sufficient and leaves no residue at all. Reserve the cleaning solution for moderately to heavily soiled areas or for periodic deep cleaning rather than every mopping session.
Fill Level
Fill the bucket to approximately two-thirds of its capacity. A full bucket is harder to maneuver without spilling and makes it difficult to press the mop head through the wringer cleanly. Two-thirds capacity gives sufficient water depth to saturate the pad fully while leaving room for the wringer mechanism to operate without overflow.
Adjusting the Handle to the Right Height
Handle height is frequently overlooked but directly affects both cleaning effectiveness and physical comfort. The correct handle height positions the top of the handle at approximately shoulder height or slightly above when the mop head is flat on the floor. This allows you to push the mop forward and pull it back in long, fluid strokes using your body weight and shoulder motion rather than relying on arm strength alone.
A handle set too short forces you to hunch forward, reducing stroke length and increasing back strain over a cleaning session. A handle set too tall reduces the downward pressure you can apply to the mop head, leaving more soil on the floor with each pass. Most telescopic handles on flat mop sets adjust in 5 cm increments — take one minute to set it correctly before starting.
Loading the Mop Pad: Saturating and Wringing Correctly
How wet the mop pad is when it touches the floor is the single biggest determinant of cleaning quality. A pad that is too wet spreads dirty water across the floor and leaves it pooled in grout lines, around baseboard edges, and in surface irregularities. A pad that is too dry drags across the floor without loosening soils effectively.
The correct moisture level is described as damp, not wet — the pad should feel moist when squeezed firmly but should not drip or release water when lifted from the floor. Achieving this moisture level depends on using the wringer mechanism correctly:
- Place the mop head flat in the bucket and submerge it fully for 3 to 5 seconds, ensuring the entire pad is saturated evenly.
- Lift the mop and position the head in the wringer slot or press frame with the pad centered.
- Apply the wringer — either by pressing the pedal, pushing down on the press frame, or activating the squeeze mechanism — and hold for a full 2 to 3 seconds. A quick partial press leaves the pad too wet.
- Lift the mop from the wringer and check the pad. If water drips from the pad when you tilt it, press it through the wringer once more. The goal is a pad that is uniformly moist but holds its water when tilted at 45°.
New microfiber pads often absorb more water than pads that have been used several times. After two or three wring cycles, a new pad settles into its optimal moisture-holding behavior. If a new pad seems excessively wet after wringing, wring it twice before mopping.
Effective Mopping Technique: Strokes, Direction, and Pattern
The way you move the mop across the floor determines whether soil is removed from the floor or simply redistributed across it. Effective flat mopping relies on three technique principles: stroke pattern, direction of work, and overlap.
Use S-Shaped or Figure-Eight Strokes
Unlike traditional string mops that work in a scrubbing push-pull motion, flat mops are most effective when moved in a continuous S-shape or figure-eight pattern. This motion keeps the mop head in constant forward progress while ensuring that soil picked up on one side of the pad does not drag back across already-cleaned floor on the return stroke. The S-pattern also uses the full width of the mop head on each pass, maximizing coverage per stroke.
Avoid a straight push-forward, pull-back stroke, which deposits the soil accumulated on the leading edge of the pad back onto the floor on the pull stroke. With the S-pattern, the mop head pivots at each end of the stroke so the same face of the pad continues to lead the cleaning direction.
Work Backward Toward the Exit
Always start mopping at the corner or wall farthest from the room's exit and work progressively backward toward the door. This ensures you never step on a freshly mopped floor, which would leave footprints and transfer soil from your footwear back to the clean surface. In large rooms, mentally divide the floor into 2- to 3-meter-wide lanes and complete each lane before moving to the next.
Overlap Each Stroke by 5 to 10 cm
Each forward S-stroke should overlap the previous one by approximately 5 to 10 cm. This ensures no dry strip is left between adjacent passes and also means that any soil pushed to the edge of one stroke is captured by the overlap of the next. Skipping overlaps leaves visible dry lines between passes that are particularly noticeable on dark-colored floors or polished surfaces.
Use the Swivel Head Around Obstacles
The 360° swivel joint on a flat mop head is not a convenience feature — it is an efficiency tool. When mopping around chair legs, table bases, or toilet bases, use the swivel to rotate the mop head parallel to the obstacle's edge and slide it around without lifting the pad from the floor. Lifting the mop around obstacles breaks the continuous S-stroke rhythm and risks dripping water onto already-cleaned areas.
How Often to Change the Water During a Cleaning Session
Continuing to mop with visibly dirty water is one of the most common and counterproductive mistakes in floor cleaning. Dirty mop water redistributes dissolved soil, bacteria, and suspended particles across the floor surface, leaving it technically wet but not clean. The floor may appear clean when wet but will show a dull, streaky film as it dries.
As a practical guideline:
| Soil Level | Typical Environment | Recommended Water Change |
|---|---|---|
| Light (daily maintenance) | Bedroom, living room, low-traffic office | Every 40–60 m² |
| Moderate (regular cleaning) | Kitchen, hallway, bathroom, dining area | Every 20–30 m² |
| Heavy (deep clean or post-event) | Commercial kitchen, workshop, gym floor | Every 10–15 m² or when water turns visibly grey |
| Sanitizing (infection control) | Sick room, medical setting, food prep area | Every room or zone — fresh solution each time |
A simple visual rule: if you cannot see the bottom of the bucket clearly through the water, change it. Transparency of the cleaning solution is a reliable proxy for its remaining cleaning capacity. For infection control applications such as cleaning after illness, use fresh water and fresh disinfectant solution for each separate room or defined zone, regardless of how large or small the area is.
Pre-Sweeping: Why It Matters Before Every Mopping Session
Mopping effectively requires a pre-swept floor. Attempting to mop a floor with dry debris — dust, crumbs, pet hair, sand — on its surface causes the mop pad to push large particles into corners and along baseboards rather than picking them up, and the wet pad will tangle fine debris like hair into the pad fibers, making post-cleaning rinsing much more difficult.
Always dry-sweep or vacuum the floor before mopping. This step removes the bulk of loose debris so that the mopping process can focus entirely on dissolved soils, sticky residues, and surface grime that only wet cleaning can address. For best results, use a dry flat mop head (microfiber dry pad) for the sweeping pass and then switch to a damp pad for mopping — many flat mop systems include both a dry and a wet pad for exactly this dual-purpose workflow.
On floors with grout lines — ceramic tile, natural stone — pre-sweeping is especially important because wet mopping drives fine particles deep into grout channels where they are very difficult to remove and cause progressive discoloration over time.
Mopping Different Floor Types: Technique Adjustments
The same flat mop bucket set works across many floor types, but the water volume, cleaning solution, and stroke pressure should be adjusted based on the specific floor material.
Hardwood and Engineered Wood Floors
Wood floors are the most moisture-sensitive surface a flat mop will encounter. Excess water causes wood fibers to swell, leading to cupping, warping, and finish damage over time. For hardwood and engineered wood, wring the mop pad until it is barely damp — the pad should feel almost dry to the touch, and only a faint moisture track should be left on the floor, which should evaporate within 30 to 60 seconds. Use a wood-specific pH-neutral cleaner at the lowest recommended dilution. Never let water pool near seams, in scratches, or at the edges of planks.
Ceramic and Porcelain Tile
Tile is the most forgiving surface for flat mopping — it tolerates more moisture, is unaffected by most cleaning solutions, and benefits from slightly firmer mop pressure to dislodge soils from texture and grout. For tiles with deeply textured surfaces, make two passes at 90° to each other — the first pass in the direction of the texture channels, the second perpendicular — to ensure cleaning solution reaches into surface recesses.
Vinyl, LVT, and Laminate
Vinyl and laminate floors should be mopped with a damp (not wet) pad and a mild, pH-neutral cleaner. Avoid steam or very hot water on laminate — the heat and moisture can penetrate seams and cause swelling at plank joints. The surface of LVT (luxury vinyl tile) can become slippery when wet, so ensure the pad is well-wrung and the floor surface is dried quickly in high-traffic areas.
Natural Stone (Marble, Slate, Travertine)
Natural stone requires a pH-neutral cleaner exclusively. Acidic cleaners — including many common multipurpose floor cleaners and vinegar-based solutions — etch and dull the surface of marble, limestone, and travertine irreversibly. Use only cleaners specifically labeled safe for natural stone, dilute to the minimum recommended concentration, and rinse with clean water after cleaning to remove all residue. Wring the pad thoroughly to minimize moisture in the porous stone surface.
Common Mistakes and How to Avoid Them
Understanding what goes wrong is just as useful as knowing correct technique. These are the most frequent flat mop bucket mistakes and their solutions:
- Mopping without sweeping first: Results in a wet pad clogged with debris and soil pushed into corners. Always sweep or vacuum before mopping.
- Using too much cleaning solution: Leaves a sticky residue that attracts new dirt rapidly and causes streaking as the floor dries. Use the minimum recommended concentration.
- Not wringing the pad sufficiently: A dripping wet pad floods grout lines, seeps under baseboards, and leaves water marks and streaks. Press the wringer for a full 2 to 3 seconds.
- Using the same dirty water throughout: Recycles soil across the floor surface, leaving a dull film. Change water when it becomes visibly murky.
- Mopping forward instead of backward: Stepping on a freshly mopped floor transfers footwear soils back onto the clean surface. Always work toward the exit.
- Leaving the used pad wet in the bucket: A damp mop pad left in stagnant water for hours is an ideal environment for bacterial growth. Rinse and hang the pad to dry after every use.
- Washing microfiber pads with fabric softener: Fabric softener coats microfiber strands with a waxy film that dramatically reduces their absorbency and soil-trapping performance. Always wash microfiber pads without softener, at temperatures below 60°C.
- Using abrasive cleaners on microfiber pads: Abrasive particles damage the fine fibers of the pad, reducing effectiveness and service life. Use only gentle, non-abrasive liquid cleaners with flat mop systems.
Cleaning and Maintaining the Mop Pad
The mop pad is a consumable that degrades over time, but correct care can significantly extend its useful life and maintain its cleaning performance between replacements. A well-maintained microfiber pad can last 200 to 500 wash cycles before its fiber structure degrades enough to affect cleaning performance — poor care can reduce this to fewer than 50 cycles.
After Each Use
- Remove the pad from the mop frame and rinse it thoroughly under running warm water until the rinse water runs clear
- Wring out excess water by hand and hang the pad in an area with good airflow to dry completely before storage — never store a damp pad folded or in a sealed container
- If the pad is heavily soiled, pre-soak it in warm water for 15 to 20 minutes before rinsing to loosen embedded soils
Machine Washing the Pad
- Machine wash microfiber pads at 40°C to 60°C using a standard liquid laundry detergent — no fabric softener, no dryer sheets, and no bleach unless the pad manufacturer specifically permits bleach use
- Wash mop pads separately from other laundry — especially cotton items — because cotton lint embeds into microfiber and reduces cleaning performance
- Air-dry the pad after washing rather than tumble-drying at high heat; high-temperature drying melts the fine polyester fibers in microfiber pads and permanently destroys their performance
When to Replace the Pad
Replace the mop pad when it no longer feels absorbent when wet, when fibers are visibly matted or worn flat, when it develops a persistent odor that washing does not eliminate, or when it leaves streaks on a freshly cleaned floor despite correct wringing and technique. A degraded pad is not just less effective — it may leave more residue on the floor than it removes.
Maintaining the Bucket and Wringer Mechanism
The bucket and wringer require their own regular maintenance to function correctly and hygienically over time. Neglected buckets develop biofilm, mineral scale from hard water, and mechanical stiffness in the wringer that makes effective wringing impossible.
- After every use: Empty the bucket completely, rinse it with clean water, and leave it inverted or on its side to dry. Never store a flat mop bucket with standing water inside.
- Weekly (or after heavy use): Clean the inside of the bucket with a mild disinfectant solution, paying particular attention to the corners and the wringer mechanism where soil and biofilm accumulate. Rinse thoroughly and dry.
- For mineral scale: Fill the bucket with a solution of 1 part white vinegar to 4 parts water, leave for 20 to 30 minutes, scrub with a brush, and rinse. This removes calcium and lime deposits from hard water areas that build up on the bucket interior and wringer surfaces.
- For the wringer mechanism: Check hinges, press plates, and pedal mechanisms periodically for debris accumulation. Rinse the wringer under running water after each use and allow it to air-dry. If the press mechanism becomes stiff, check for trapped fiber debris in the hinge points and remove it with a stiff brush.
Flat Mop Bucket Set Tips for Specific Cleaning Scenarios
Different cleaning scenarios call for slight technique variations to get the best results from the same flat mop bucket set.
Spill Cleanup
For liquid spills, blot the spill first with the dry mop pad to absorb the bulk of the liquid, then switch to a damp pad with cleaning solution to clean the residue. Attempting to mop a large liquid spill with a damp pad first simply spreads the spill over a wider area before it can be absorbed.
Large Open Areas
For large open areas such as open-plan offices, school hallways, or commercial retail spaces, divide the area into 3-meter-wide lanes and complete each lane sequentially. Keep the bucket positioned at the edge of the area being cleaned so it is always within arm's reach — walking long distances with the mop to re-dip and wring wastes time and causes the pad to dry out on the floor before a fresh pass can be made.
Disinfection After Illness
When disinfecting floors after illness in the household, use a disinfectant cleaner that is confirmed effective against the relevant pathogen (check the product's label for its antimicrobial claims). Allow the cleaning solution to remain on the floor surface for the contact time specified on the disinfectant's label — typically 30 seconds to 5 minutes — before wiping or allowing to dry. Use a fresh mop pad and fresh solution for each room to prevent cross-contamination between areas.
Greasy Kitchen Floors
Greasy floors require a degreasing cleaning agent and slightly warmer water than standard mopping. Apply the solution generously, allow it to dwell on the surface for 2 to 3 minutes to emulsify the grease, and then mop with firm, overlapping strokes. A second pass with clean water only — using a freshly rinsed and wrung pad — is recommended after degreasing to remove all cleaning agent residue, which can leave the floor dangerously slippery if allowed to remain.