
 English
 Español
 中文简体
中文简体
Content
- 1 Why Correct Technique Matters More Than the Mop Itself
- 2 Step One: Prepare the Floor Before Mopping
- 3 Step Two: Set Up the Mop Handle at the Correct Height
- 4 Step Three: Prepare the Cleaning Solution at the Correct Dilution
- 5 Step Four: Wet and Wring the Pad to the Correct Moisture Level
- 6 Step Five: Mop the Floor with Correct Stroke Technique
- 7 Adjusting Technique for Different Floor Types
- 8 When to Change the Cleaning Solution
- 9 Common Flat Mop Mistakes and How to Correct Them
- 10 After Mopping: Drying Time and Floor Safety
- 11 Flat Mop Pad Care: Washing, Drying, and Extending Pad Life
- 12 Complete Flat Mop Usage Quick Reference
Using a Flat Mop correctly requires five core steps: prepare the floor by sweeping or vacuuming first, set the handle height to your wrist level, wet and wring the pad to a damp — not wet — state, mop from the far corner toward the exit using overlapping S-strokes, and clean or replace the pad before it becomes saturated with dirt. Most people who are dissatisfied with their flat mop results are making one of two mistakes: skipping the dry floor preparation step, or mopping with an oversaturated pad that pushes dirty water across the floor instead of lifting it. This guide covers every stage of correct flat mop use in practical detail, including floor-type adjustments, common errors, technique improvements, and care routines that extend the mop pad's working life to 300 or more wash cycles.
Why Correct Technique Matters More Than the Mop Itself
A flat mop is one of the most efficient floor cleaning tools available — independent testing has shown that microfiber flat mop pads remove up to 99% of bacteria from hard floor surfaces using water alone, compared to approximately 30% removal achieved by traditional cotton string mops used with a disinfectant solution. (Source: American Journal of Infection Control, Volume 35, Issue 9, 2007)
However, this performance level is only achieved when the mop is used with correct technique. An oversaturated pad operated at the wrong angle traps no more bacteria than a traditional mop. A dry pad used without prior sweeping embeds grit into the floor surface. Understanding why each step of the correct method matters — not just what to do — is what transforms an average cleaning result into a genuinely clean floor every time.
Step One: Prepare the Floor Before Mopping
The single most common mistake flat mop users make is going straight to wet mopping without a dry preparation step. This turns the mopping session into a spreading exercise — the wet pad picks up loose debris and redistributes it across the floor surface rather than removing it.
Sweep or Vacuum the Entire Floor Area First
Before the flat mop touches the floor, remove all loose debris — hair, crumbs, dust, and grit — by sweeping or vacuuming. Pay particular attention to:
- Floor-to-wall junctions and baseboards where dust and hair accumulate and are easily missed by the mop head
- Under furniture where the flat mop's low-profile head can reach, but where dry sweeping removes the bulk of debris before the wet pad contacts it
- Kitchen floor areas around appliances and under counters where food debris, oil splatter, and grit collect
- Entrance areas where outdoor grit, sand, and debris enter on footwear and can scratch polished floor surfaces if mopped without prior removal
Research from the ISSA (Worldwide Cleaning Industry Association) shows that pre-sweeping before mopping reduces pad contamination by up to 60% during the mopping pass, directly extending the effective cleaning range of each pad load before re-wetting is needed and preventing grit from causing micro-scratches on polished or coated floor surfaces. (Source: ISSA Cleaning Industry Research Institute, Best Practice Cleaning Guidelines, 2019)
Move Obstacles and Furniture
Move lightweight furniture, floor mats, pet bowls, waste bins, and other floor-level items before mopping begins. This allows you to clean the full floor area in one continuous pass without stopping to reposition items and avoids the error of setting wet furniture legs back onto a freshly cleaned wet surface. The flat mop head can slide under most fixed furniture — sofas, beds, and low cabinets — without lifting them, so only items that sit on the floor and cannot be mopped under need to be moved.
Step Two: Set Up the Mop Handle at the Correct Height
Correct handle height is one of the most overlooked aspects of flat mop technique and one of the most consequential for both cleaning effectiveness and physical comfort during extended mopping sessions.
The Wrist-Height Rule
Adjust the telescoping handle of the Flat Mop so that the top of the handle reaches approximately wrist height when your arm hangs naturally at your side while standing upright. This height positions your hands and shoulders in a natural, upright mopping posture that allows full-length strokes across the floor without bending forward.
A handle set too short forces a forward lean that strains the lower back and reduces stroke length. A handle set too long creates an awkward forward reach that reduces your ability to apply even downward pressure on the pad — the pressure that keeps the pad in flat contact with the floor across its full width throughout the stroke.
Health and Safety Executive (UK) research found that incorrect tool handle height is a contributing factor in 34% of work-related musculoskeletal disorders among cleaning professionals, with back and shoulder injuries most commonly associated with handles set too short for the operator's height. (Source: HSE UK, Upper Limb Disorders in the Workplace, 2nd Edition, 2002)
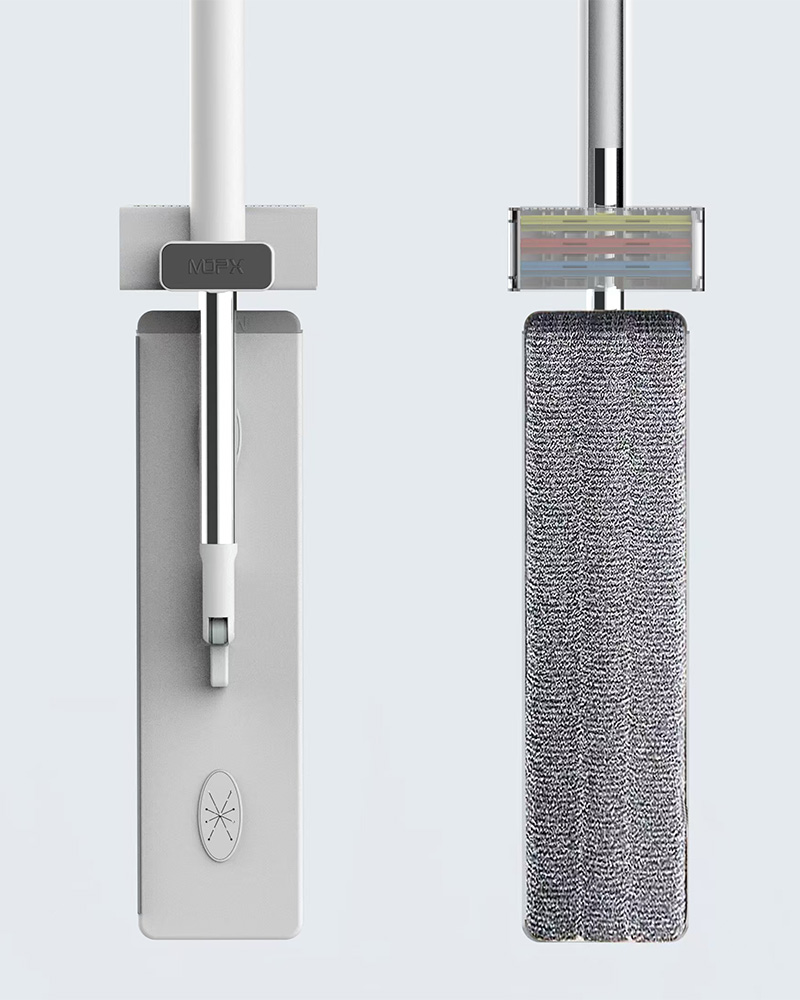
Attaching the Mop Pad Correctly
Before using the mop, confirm the pad is correctly and fully attached to the mop head plate. Most flat mops use one of two pad attachment systems:
- Hook-and-loop (Velcro-type) fastening: Press the pad onto the mop head from the center outward, ensuring all four corners are fully secured. Partially attached corners fold under during mopping and leave uncleaned strips across the floor
- Sleeve or pocket attachment: Slide the mop head plate into the pad's fabric pockets at both ends simultaneously, then press the plate down firmly until it sits flat with no bunching at the edges. A correctly seated pad should lie completely flat against the floor when the mop is placed down
Any pad that has lifted corners, wrinkles, or bunched fabric at the edges will not clean effectively and will leave visible streak marks across the floor surface where the pad lifts off and fails to contact the floor.
Step Three: Prepare the Cleaning Solution at the Correct Dilution
The cleaning solution you use — and how you dilute it — significantly affects both cleaning effectiveness and the condition the floor is left in after mopping. The two most common dilution errors are over-concentration (leaving a sticky residue that attracts new dirt within hours) and under-concentration (ineffective cleaning that leaves grease and biofilm on the floor surface).
Dilution Guidelines by Floor Type
| Floor Type | Recommended Cleaner | Typical Dilution | Water Temperature |
|---|---|---|---|
| Ceramic and porcelain tile | All-purpose floor cleaner | 30 to 50 ml per 10 liters | Warm (40 to 50 degrees Celsius) |
| Vinyl and LVT | pH-neutral floor cleaner | 20 to 30 ml per 10 liters | Warm (35 to 45 degrees Celsius) |
| Laminate flooring | Laminate-specific or pH-neutral | 15 to 20 ml per 10 liters | Cool to warm (25 to 35 degrees Celsius) |
| Engineered hardwood | Wood-specific floor cleaner | 10 to 15 ml per 10 liters | Cool (20 to 30 degrees Celsius) |
| Sealed concrete | All-purpose or stone cleaner | 30 to 50 ml per 10 liters | Warm (40 to 50 degrees Celsius) |
| Natural stone (marble, slate) | pH-neutral stone cleaner only | 15 to 20 ml per 10 liters | Cool (20 to 30 degrees Celsius) |
Always add the cleaning product to the water after filling — not the other way around — to prevent excessive foaming in the bucket. Never apply neat (undiluted) cleaning product directly to the mop pad or to the floor surface. Even mild products applied without dilution will leave a film that dulls floor finishes and attracts dirt more rapidly than a correctly diluted solution.
Step Four: Wet and Wring the Pad to the Correct Moisture Level
Getting the pad moisture level right is the single most important technique variable in flat mop use. The target is a damp pad — not wet, not dry. A damp pad cleans effectively, dries quickly, and does not damage moisture-sensitive floors. A wet pad pushes dirty water across the floor, saturates laminate or wood, and leaves puddles that are a slip hazard and an odor risk.
How to Wring a Flat Mop Pad Correctly
The wring method depends on the type of flat mop system you are using:
- Bucket wringer flat mop system: Submerge the pad fully in the cleaning solution. Lift the mop out and position the pad in the wringer basket. Press the wringer lever or pedal with a single firm stroke to apply flat, even compression across the full pad width. A quality flat-press wringer removes 70 to 85% of absorbed water in one compression cycle. (Source: Journal of Cleaning Science and Technology, Vol. 12, 2014). After wringing, the pad should feel cool and damp to the touch of the back of your hand, but should not drip when held horizontally
- Spray flat mop system: Press the trigger to spray a measured amount of solution directly onto the floor section ahead of the mop head. The spray volume is factory-set to deliver the correct damp level without manual wringing. Move the mop through the sprayed section before the solution has time to spread beyond the pad width
- Twist-wring flat mop: Hold the mop upright and twist the handle in the direction marked on the wring mechanism until resistance increases. A full twist cycle wrings approximately 70% of water from the pad. Avoid over-twisting, which can damage the pad fibers over time
The Damp Test
Before starting each mopping pass, perform a quick damp check: press the back of your hand briefly against the freshly wrung pad. You should feel distinct coolness and moisture — similar to pressing the back of your hand against a damp sponge. If the pad feels wet or releases visible water under light pressure, wring again. If it feels barely cool or dry, re-wet and wring to the correct level. Doing this check before the first stroke of each bucket load prevents the most common cause of streaky, unsatisfactory results.
Step Five: Mop the Floor with Correct Stroke Technique
The mopping stroke pattern is where correct technique produces visibly better results than casual mopping. The wrong pattern leaves uncleaned strips and redistributes dirt; the right pattern covers every section of floor in at least one consistent direction with complete pad contact throughout.
Start at the Far Corner and Work Toward the Exit
Always begin mopping at the corner of the room furthest from the door and work systematically backward toward the exit. This is the single most important positional rule in flat mop use — it ensures you never step back onto a freshly mopped section and avoids footprints in the cleaned area. Position yourself at the far corner with the exit behind you and maintain this direction throughout the session.
Use an S-Stroke or Overlapping Figure-8 Pattern
Straight parallel back-and-forth strokes leave uncleaned lines at each reversal point where the mop lifts off the floor. An S-stroke — sweeping from one side to the other in a continuous flowing S-shape as you walk backward — ensures each stroke overlaps slightly with the previous one, covering the complete floor width without gaps. For heavily soiled areas, a figure-8 pattern passes each floor section in two different directions, increasing the mechanical trapping action of the pad on adhered soil.
Apply light, consistent downward pressure throughout each stroke — enough to keep the full pad width in contact with the floor, but not so much that you are pressing hard into the floor. The microfiber pad does the cleaning work through its fiber structure; pressing harder does not improve the result and increases handle vibration and operator fatigue.
Reaching Under Furniture and Into Corners
Use the pointed front corner of the flat mop head to access tight angles — floor-to-wall junctions, around toilet bases, and between appliances. Angle the handle to approximately 30 to 40 degrees from vertical to increase the reach under fixed furniture without forcing the pad to fold up at the leading edge. The flat head profile slides under sofas, beds, and cabinets to a depth of 20 to 35 cm without requiring furniture to be lifted — a key advantage of the flat mop design over upright cleaning tools.
Re-Wet and Re-Wring Every 15 to 20 Square Meters
As the pad picks up dirt, it gradually loses both moisture and cleaning capacity. On a typical domestic floor with average soiling, re-wring the pad and reload it with fresh solution every 15 to 20 square meters. The visual cue for when this is needed is when the pad begins to drag slightly on the floor rather than gliding smoothly, or when you can see soil being redistributed on the surface rather than being lifted.
In commercial or heavily soiled environments, reduce this interval to every 10 square meters. In lightly soiled spaces such as bedrooms and living rooms where the floor is cleaned frequently, you may extend to 25 to 30 square meters before re-wetting is necessary.
Adjusting Technique for Different Floor Types
The core mopping technique is consistent across all hard floor types, but specific adjustments improve results and protect floor surfaces on the most common floor materials:
| Floor Type | Key Technique Adjustment | What to Avoid |
|---|---|---|
| Ceramic and porcelain tile | Mop in two directions to reach grout lines; use warm water for grease | Leaving standing water in grout channels where staining can develop |
| Vinyl and LVT | Damp-only mopping; avoid excess moisture near seams and joins | Wet mopping near seam edges where water ingress can cause lifting |
| Laminate flooring | Wring pad very thoroughly; dry any water pooling immediately | Any standing water; the core swells irreversibly with moisture ingress |
| Engineered hardwood | Lightly damp pad only; mop in the direction of the wood grain | Wet mopping; acidic or alkaline cleaners that strip the surface seal |
| Sealed concrete | Damp to moderately wet mopping acceptable; large areas benefit from high-speed pass | Abrasive pads that scratch the sealer surface |
| Natural stone (marble, slate) | pH-neutral cleaner only; cool water; gentle stroke pressure | Acidic cleaners (vinegar, lemon-based) that etch the stone surface |
When to Change the Cleaning Solution
One of the most consistently overlooked aspects of correct flat mop use is knowing when to replace the cleaning solution in the bucket. Once the solution becomes visibly discolored — turning grey, brown, or cloudy — it is no longer cleaning the floor. It is depositing suspended soil from the water back onto the surface with each stroke, effectively reversing the work already done.
The correct frequency for solution change depends on the floor's soiling level:
- Light domestic soiling (bedroom, living room): Change solution every 60 to 80 square meters
- Moderate soiling (hallway, office): Change solution every 40 to 60 square meters
- Heavy soiling (kitchen, entrance area): Change solution every 20 to 30 square meters
- Commercial high-traffic areas: Change solution every 10 to 20 square meters
When changing solution, empty the bucket completely, rinse it with clean water, and refill with fresh diluted solution. Never add fresh cleaning concentrate to an already dirty bucket — this dilutes the concentrate without improving the contaminated water already in the bucket.
Common Flat Mop Mistakes and How to Correct Them
Even experienced users make these recurring technique errors that significantly reduce cleaning effectiveness:
- Mopping in straight parallel lines: Creates uncleaned strips at each reversal point. Correct by switching to an S-stroke that overlaps each pass by 5 to 10 cm on both sides
- Using an oversaturated pad: The most common cause of streaky results. Correct by wringing the pad until no dripping occurs before starting each pass, and rechecking with the damp test after each wring cycle
- Mopping without pre-sweeping: Results in grit and debris being pushed across the floor rather than removed. Always dry-prepare the floor before wet mopping
- Continuing past a saturated pad: A pad loaded with soil redistributes contamination rather than removing it. Re-wet and re-wring at the correct interval, or swap to a clean pad for large areas
- Mopping from the door inward: Forces you to walk back across the clean area, leaving footprints. Always start at the far corner and mop toward the exit
- Using an incorrectly diluted solution: Over-concentration leaves sticky residue; under-concentration leaves grease and biofilm. Measure the dilution accurately using the bucket's volume markings and the product's specified dose
- Over-wetting laminate or wood floors: Standing water causes irreversible swelling of laminate cores and surface lifting on engineered wood. Wring the pad very thoroughly before each pass on these floor types and immediately dry any pooling water
After Mopping: Drying Time and Floor Safety
A correctly damp-mopped floor dries within 3 to 8 minutes at normal room temperature (20 degrees Celsius) with standard air movement. If your floor takes longer than 10 minutes to dry after mopping, the pad was too wet — adjust the wring cycle for the next session.
Until the floor is fully dry, it presents a slip risk regardless of the cleaning agent used. Post-mopping slips on wet floors account for a significant proportion of domestic accidents:
- Place wet floor warning signs or barrier cords across doorways in commercial or multi-occupant residential settings until the floor is confirmed dry
- In domestic settings, mop in sections and allow each section to dry before walking across it — or mop the full room and use an alternative access route until the floor dries
- Improve drying speed by opening windows to increase air movement, switching on ceiling fans, or turning up the heating slightly in cold weather — all of which increase the evaporation rate of the residual surface moisture
Flat Mop Pad Care: Washing, Drying, and Extending Pad Life
Correct pad care after each use is as important as correct technique during use. A poorly maintained pad loses its microfiber cleaning effectiveness quickly and may harbor bacteria between uses if not properly cleaned and dried.
Washing the Pad Correctly
- Remove and rinse immediately after use: Remove the pad from the mop head immediately after mopping and rinse it under running cold water to flush the majority of captured soil before it dries into the fiber structure
- Machine wash at 60 degrees Celsius: This temperature sanitizes the pad by killing the majority of common household bacteria and viruses while maintaining fiber integrity. Do not wash above 90 degrees Celsius, which degrades microfiber bonding over repeated cycles
- Never use fabric softener: Fabric softener coats the individual microfiber strands, blocking the microscopic gaps that create the mechanical trapping action responsible for the pad's cleaning effectiveness. A single wash with fabric softener can reduce a pad's bacterial removal rate by 30 to 40% permanently
- Do not wash with cotton fabrics: Cotton lint from towels and clothing transfers to microfiber pads during washing and clogs the fiber structure over repeated washes. Wash microfiber pads separately or with other synthetic fabrics only
(Source: European Committee for Standardization, EN ISO 6330 Textile Washing Procedures for Testing Purposes)
Drying and Storage
- Air dry or low-heat tumble dry: High heat degrades the polyester-polyamide fiber bond in microfiber pads over time. Air drying is preferred; low-heat tumble drying is acceptable and does not significantly reduce lifespan
- Store dry: Never store a damp pad inside a closed bag or container. Storing a wet pad in an enclosed space creates conditions for mold growth and bacterial proliferation that makes the pad a contamination source at the next use
- Inspect before each use: Check the pad for tears, worn patches, or heavily matted fibers before each session. A pad that has lost its fiber texture or developed bare patches should be replaced — a worn pad spreads soil rather than removing it
How Long a Flat Mop Pad Lasts
A quality microfiber flat mop pad correctly maintained as described above retains full cleaning effectiveness for 300 to 500 machine wash cycles. At one wash per week (the typical frequency for a domestic user cleaning twice weekly), this represents a pad service life of 6 to 10 years — making proper maintenance a significant factor in the long-term value of the flat mop system. (Source: EN ISO 6330, European Committee for Standardization)
The Mop-X Flat Mop is designed with a high-density split microfiber pad, telescoping handle with height markings for easy adjustment to correct working height, and a secure hook-and-loop pad attachment system that ensures full-width floor contact throughout the stroke. It integrates directly with the Mop-X bucket wringer system for complete moisture control, making it a practical tool for consistently achieving the correct technique described throughout this guide.
Complete Flat Mop Usage Quick Reference
| Step | Action | Key Point |
|---|---|---|
| 1 — Prepare floor | Sweep or vacuum all loose debris; move obstacles | Reduces pad contamination by up to 60% |
| 2 — Set up mop | Attach pad fully; adjust handle to wrist height | No lifted corners on pad; straight back posture during mopping |
| 3 — Prepare solution | Fill bucket with water, add cleaner at correct dilution | Add cleaner to water, not water to cleaner |
| 4 — Wet and wring | Saturate pad; wring until damp — no dripping | 70 to 85% water removal per wring cycle is the target |
| 5 — Mop with S-stroke | Start far corner; overlapping S-strokes toward exit | Re-wring every 15 to 20 sq meters; light downward pressure |
| 6 — Change solution | Replace when water visibly discolors | Kitchen and entrances: every 20 to 30 sq meters |
| 7 — Allow to dry | Keep foot traffic off until dry (3 to 8 minutes) | Increase ventilation to speed drying |
| 8 — Clean the pad | Rinse immediately; machine wash at 60 degrees Celsius; no softener | Pad life: 300 to 500 wash cycles with correct care |
The bottom line: a Flat Mop used with correct technique — dry preparation, correct moisture level, overlapping S-strokes from the far corner to the exit, and properly maintained pads — cleans faster, removes more bacteria, and leaves floors in better condition than any traditional mopping method. The entire process takes no longer to execute correctly than incorrectly, and the difference in results is visible from the first session.