English
 Español
 中文简体
中文简体
Content
- 1 Step One: Prepare the Floor Before You Mop
- 2 Step Two: Fill the Bucket with the Correct Solution
- 3 Step Three: Attach the Mop Pad and Set the Handle Height
- 4 Step Four: Wet and Wring the Pad Correctly
- 5 Step Five: Mop the Floor Using Correct Technique
- 6 Step Six: Change the Solution When It Discolors
- 7 Step Seven: Post-Cleaning Care for the Pad and Bucket
- 8 Quick Reference: Complete Usage Guide at a Glance
Using a Flat Mop Bucket Set correctly takes less than two minutes to learn and produces noticeably better results than traditional mopping from the first use. The core process is straightforward: prepare the floor, fill the bucket with the correct dilution, wet and wring the mop pad to damp, mop from the far corner toward the exit using overlapping strokes, and wring and re-wet the pad every 15 to 20 square meters. What separates a good clean from a mediocre one is not effort, but technique — specifically the wringing step, the mopping pattern, and how frequently you refresh the solution. This guide covers every step in practical detail so you get the best results the set can deliver.
Step One: Prepare the Floor Before You Mop
The single most common mistake with any mop system is skipping floor preparation. Mopping over loose debris — hair, crumbs, dust, and grit — embeds it in the wet pad and pushes it into corners rather than removing it. A flat mop and bucket set is most effective as the second step, not the first.
Sweep or Vacuum First
Before filling the bucket, sweep or vacuum the entire floor area to be mopped. Pay particular attention to:
- Floor-wall junctions and baseboards where dust and hair accumulate
- Under furniture where the mop will need to reach
- Kitchen floor areas around appliances and under counters where food debris collects
Research from the ISSA (Worldwide Cleaning Industry Association) shows that pre-sweeping before mopping reduces pad contamination by up to 60%, which directly extends the effective cleaning range of each pad before it needs rinsing or replacement and prevents loose grit from scratching polished floor surfaces during the mopping pass. (Source: ISSA Cleaning Industry Research Institute, Best Practice Cleaning Guidelines, 2019)
Move Furniture and Obstacles
Move chairs, waste bins, floor mats, and lightweight furniture to one side of the room before starting. This allows you to mop the full floor in one pass without stopping to reposition obstacles and avoids setting wet furniture legs back onto a freshly mopped surface. Flat mop heads can reach under most fixed furniture — sofas, cabinets, and beds — without requiring furniture to be lifted, which is one of their key advantages over upright cleaning equipment.
Step Two: Fill the Bucket with the Correct Solution
Correct solution preparation is one of the most impactful factors in cleaning effectiveness and floor safety. Too concentrated a solution leaves a sticky residue that attracts new dirt quickly. Too dilute a solution cleans superficially. The bucket in a quality Flat Mop Bucket Set should include volume markings to allow precise dilution measurement.
Recommended Solution Guidelines by Floor Type
| Floor Type | Recommended Cleaner | Typical Dilution Ratio | Water Temperature |
|---|---|---|---|
| Ceramic and porcelain tile | All-purpose floor cleaner | 30 to 50 ml per 10 liters | Warm (40 to 50 degrees Celsius) |
| Vinyl and LVT | pH-neutral floor cleaner | 20 to 30 ml per 10 liters | Warm (35 to 45 degrees Celsius) |
| Laminate flooring | Laminate-specific or pH-neutral cleaner | 15 to 20 ml per 10 liters | Cool to warm (25 to 35 degrees Celsius) |
| Engineered hardwood | Wood-specific floor cleaner (no water needed if dry clean) | 10 to 15 ml per 10 liters | Cool (20 to 30 degrees Celsius) |
| Sealed concrete | All-purpose or stone cleaner | 30 to 50 ml per 10 liters | Warm (40 to 50 degrees Celsius) |
| Natural stone (marble, slate) | pH-neutral stone cleaner only | 15 to 20 ml per 10 liters | Cool (20 to 30 degrees Celsius) |
Fill the bucket to the indicated line before adding cleaner — not the other way around — to prevent excessive foaming and to make the dilution ratio accurate. Never use neat (undiluted) cleaning product directly on the floor or on the mop pad.
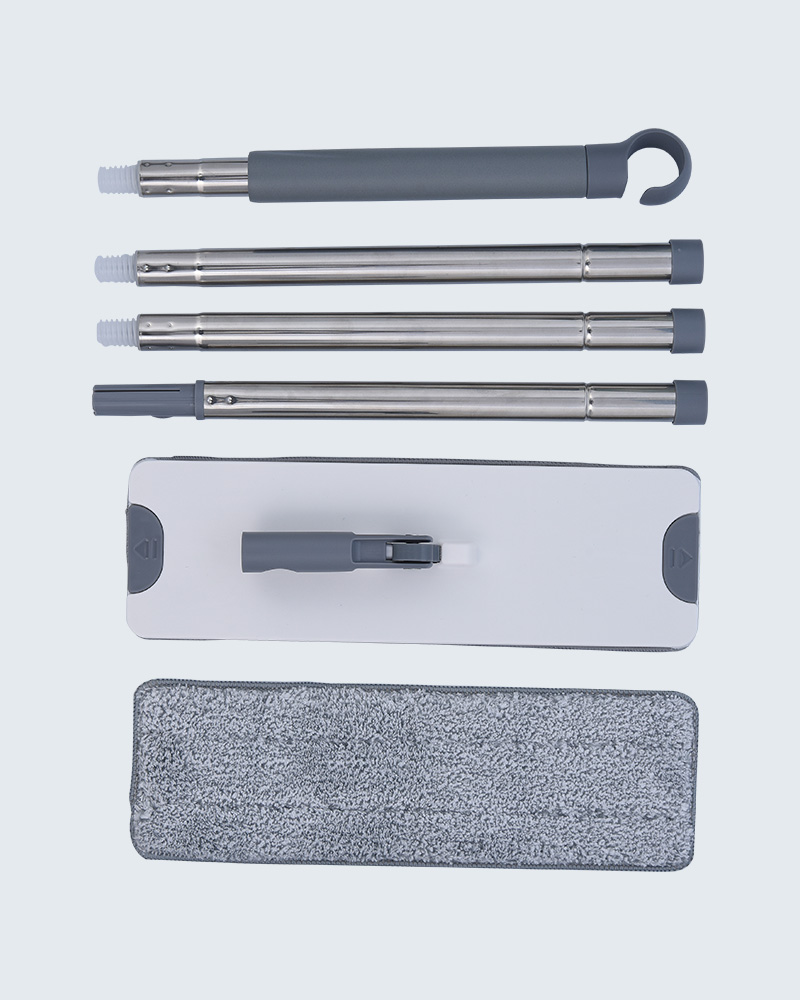
Step Three: Attach the Mop Pad and Set the Handle Height
Before the first use and whenever you change pads, take a moment to confirm the setup is correct:
Attaching the Microfiber Pad
Most flat mop systems use one of two pad attachment methods:
- Hook-and-loop (Velcro-type) fastening: Press the pad firmly onto the mop head plate from the center outward, ensuring all four corners are fully adhered. Partially attached corners fold during mopping and leave unmopped strips
- Pocket or sleeve attachment: Slide the mop head plate into the pad's fabric pockets at both ends simultaneously, then press the plate down until it seats flat. A correctly seated pad should have no loose fabric bunching at the edges
A correctly attached pad lies completely flat against the mop head with no gaps, wrinkles, or lifted corners. Any misalignment reduces floor contact and leaves uncleaned strips.
Setting the Handle Height
Adjust the telescoping handle so that the grip sits at approximately wrist height when your arm hangs naturally at your side. This keeps your back straight and your shoulders relaxed during mopping, preventing the forward lean that causes lower back strain during extended cleaning sessions. A handle set too short forces you to bend; too long causes an awkward forward reach and reduces the downward pressure on the pad needed for effective cleaning.
Ergonomics research from the Health and Safety Executive (UK) found that incorrect tool handle height is a contributing factor in 34% of work-related musculoskeletal disorders among cleaning staff — a finding equally relevant to domestic users spending 20 or more minutes mopping. (Source: HSE, UK, Upper Limb Disorders in the Workplace, 2nd Edition, 2002)
Step Four: Wet and Wring the Pad Correctly
The wring step is where most users either get the technique right or undermine the whole process. The objective is damp, not wet — a pad that leaves no puddles or visible wet trail behind it, but that still has enough moisture to loosen and lift adhered dirt from the floor.
How to Use the Flat-Press Wringer
- Submerge the mop pad fully in the cleaning solution by pressing the mop head down into the bucket until the pad is saturated
- Lift the mop out and position the pad over the wringer basin, centering it on the wringer plate
- Press the wringer lever or pedal down with a firm, single stroke to apply flat, even compression across the full pad width
- Release the wringer and lift the mop. The pad should feel noticeably lighter than when saturated and should not drip when held horizontally
- If the pad still drips after one wring cycle, repeat the wring once more. Two wring cycles is sufficient for most pads to reach the correct damp level
A quality flat-press wringer removes 70 to 85% of absorbed water in a single compression cycle, producing a consistently damp pad without requiring hand-wringing or estimation. (Source: Journal of Cleaning Science and Technology, Vol. 12, 2014)
The Damp Test
Before mopping the first stroke, press the back of your hand against the mop pad. You should feel cool dampness — similar to a damp sponge — but the pad should not feel wet or release water under light pressure. If it does, wring again. Getting this right on the first pad load of each session sets the correct moisture level for the whole cleaning pass.
Step Five: Mop the Floor Using Correct Technique
How you move the mop across the floor is as important as the preparation steps that preceded it. Poor technique on a well-prepared floor still produces an average result.
Start at the Far Corner and Work Toward the Exit
Always begin mopping at the corner of the room furthest from the door and work systematically toward the exit. This ensures you never step back onto a freshly mopped surface and avoids footprints in the clean area. Position yourself at the far corner with the door behind you as the exit point, and mop the floor in sections working back toward the door.
Use an S-Stroke or Overlapping Figure-8 Pattern
Straight parallel strokes leave uncleaned lines at the reversal points where the mop lifts off the floor. An S-stroke — sweeping from side to side in a continuous S-shape as you walk backward — ensures each stroke overlaps slightly with the previous one, covering the full floor area without gaps. For heavily soiled areas, a figure-8 pattern passes each section of floor in two crossing directions, doubling the dirt-lifting action.
Apply light, even downward pressure throughout each stroke — the flat head and microfiber pad do the work, not muscular effort. Pressing hard does not clean better; it reduces glide, tires you out faster, and can leave pressure marks on soft floor surfaces.
Re-Wring Every 15 to 20 Square Meters
As the pad picks up dirt, it gradually loses both its moisture and its trapping capacity. Re-wring the pad and re-wet it with fresh solution every 15 to 20 square meters of floor area for average domestic soiling levels. In commercial or heavily soiled environments, reduce this to every 10 square meters. The visual cue is when the pad starts to drag slightly or when you can see dirt being redistributed on the floor surface rather than being picked up by the pad.
Mopping Around Obstacles and Edges
Use the pointed front corner of the flat mop head to reach into tight angles — floor-wall junctions, around toilet bases, and in corner gaps. The flat head profile allows the pad to slide under most standard-height furniture (sofas, beds, cabinets) without lifting or tilting. Angle the mop handle to about 30 to 45 degrees from vertical to increase the reach under furniture without forcing the pad to fold up at the edges.
Step Six: Change the Solution When It Discolors
Once the cleaning solution in the bucket visibly discolors — turning grey, brown, or visibly cloudy — it is contaminating the floor rather than cleaning it. The frequency of solution changes depends on floor soiling level:
| Soiling Level | Example Location | Recommended Solution Change Frequency |
|---|---|---|
| Light soiling | Bedroom, living room | Every 60 to 80 square meters |
| Moderate soiling | Hallway, office corridor | Every 40 to 60 square meters |
| Heavy soiling | Kitchen, entrance area | Every 20 to 30 square meters |
| Commercial high-traffic | Retail floor, restaurant | Every 10 to 20 square meters |
Empty the bucket fully, rinse it with clean water, and refill with fresh solution at the correct dilution. Do not add fresh concentrate to existing dirty solution — this dilutes the fresh concentrate without improving the cleaning effectiveness of the contaminated water already in the bucket.
Step Seven: Post-Cleaning Care for the Pad and Bucket
How you care for the pad after each use directly affects its performance in the next session. Proper maintenance extends microfiber pad service life to 300 to 500 wash cycles while maintaining full cleaning effectiveness throughout. (Source: European Committee for Standardization, EN ISO 6330 Textile Washing Procedures)
Pad Washing Instructions
- Remove the pad from the mop head immediately after use and rinse it under running water to remove the majority of trapped debris before washing
- Machine wash at 60 degrees Celsius to sanitize the pad between uses. 60 degrees is sufficient to kill the majority of common household bacteria and viruses without damaging the microfiber structure
- Never use fabric softener. Fabric softener coats the microfiber strands, blocking the microscopic gaps that create the dirt-trapping action. One wash with fabric softener can permanently reduce pad effectiveness by 30 to 40%
- Air dry or tumble dry on low heat. High heat tumble drying degrades the fiber bonding in the pad over time, reducing its service life
- Do not wash microfiber pads with cotton towels or cloths — cotton lint transfers to the microfiber and clogs the fiber structure over multiple washes
Bucket Care
- Empty and rinse the bucket after every use. Leaving dirty solution in the bucket allows bacterial growth, produces odors, and leaves mineral deposits on the interior
- Wipe the wringer mechanism and basket clean after each session to prevent dried detergent residue from building up around the pivot points
- Store the bucket inverted or on its side to allow any residual moisture to drain and dry, preventing mold growth in the bucket interior
Quick Reference: Complete Usage Guide at a Glance
| Step | Action | Key Point |
|---|---|---|
| 1 - Prepare floor | Sweep or vacuum all loose debris | Reduces pad contamination by up to 60% |
| 2 - Fill bucket | Fill to line, add cleaner at correct dilution | Fill water first, then add cleaner to prevent foaming |
| 3 - Attach pad and set handle | Secure pad fully; adjust handle to wrist height | No loose corners; straight back during mopping |
| 4 - Wet and wring | Saturate pad; press wringer fully once or twice | Target: damp pad, no dripping |
| 5 - Mop with S-stroke | Start far corner, work toward exit with overlap | Re-wring every 15 to 20 sq meters |
| 6 - Change solution | Replace when water discolors | Dirty solution contaminates, not cleans |
| 7 - Clean up | Wash pad at 60C, no softener; rinse and drain bucket | Pad lasts 300 to 500 washes with correct care |
The Mop-X Flat Mop Bucket Set is designed to make every one of these steps straightforward: the flat-press wringer achieves consistent damp control in a single lever stroke, the telescoping handle adjusts to any user height, the microfiber pad attaches securely without tools, and the wheeled bucket with volume markings simplifies both solution preparation and mobility across the floor. It is built for practical everyday use and delivers professional-standard results at home and in light commercial settings.
The bottom line: using a Flat Mop Bucket Set correctly is simple once you know the key steps — and the difference between correct and casual technique is visible in the result every time you mop.